December 6 & 7, 2026 - Red Butte Garden Holiday Open House and Gift Fair. Learn More Here
May 14 - 17, 2026 - Salt Lake Art Show at the Mountain America Expo Center, Sandy, UT

Wind chimes are a wonderful way to memorialize a friend, relative or a cherished pet. I've had the honor of making several memorial wind chimes and each time it's a challenge to create something unique that represents the family member.
Most recently I was working with medals that had been awarded to an avid runner. I decided the best configuration would be circular with a long "clanger" in the middle. Now, what to use as the main circle piece? Previously I'd used a bicycle sprocket, but I thought that would be appropriate for a runner. And the hunt was on... I searched high and low and found this:

But I was going to have to remove those hooks! No worries... I put a cutoff wheel on my Dremmel and in no time, they were gone.

I sprayed the whole piece with satin black spray paint to cover the bare metal spots. Eventually I drilled holes dead center in the middle circle too.

With the pieces laid out, I envisioned what the finished chimes would look like and then sketched the pattern - mostly so I wouldn't forget as I cut the glass pieces!

I carefully cut pieces for each wind chime, following my sketch. Each piece is made from two pieces of glass with bent nichrome wire bent into loops and sandwiched between the two glass layers. When the glass melts in the kiln, the wire will be firmly embedded in the glass.

The firing process for glass is a lot like ceramics (which people are more familiar with). Glass can't be rushed - The actual firing schedule may only last for seven hours but waiting for the kiln to cool enough to remove the glass takes several more hours. At this point, it goes in the kiln and I'll come back the next day to see if anything went horribly wrong in the firing process - sometimes things go wrong...

Everything worked out well and all the wind chime pieces fused successfully! I washed them and started assembling the glass.
 |
 |
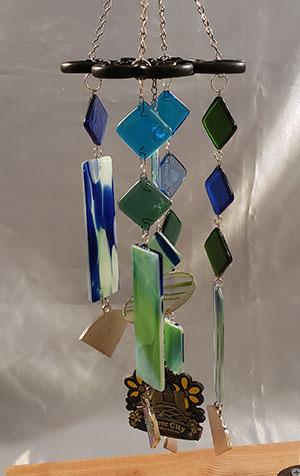
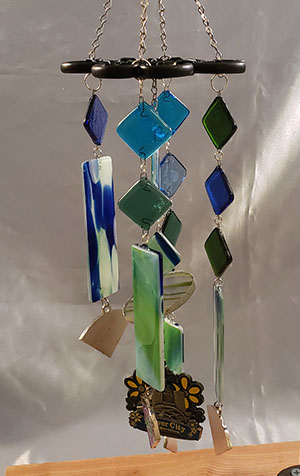
After assembling the glass pieces I put the whole wind chime together. I was really pleased with the result. And they make a nice sound - BONUS!
 |
 |